Flutter + Rive + ML Kit 🤯
Hi everyone! 🖖
In this opportunity a wanna show you a fusion that result very interesting and fun to me.
The final result was this:

The idea of the post is to show you a little of the development and how was thinking.
For this, I am going to separate the same into 3 parts:
- (Rive) Design of the animation and implementation on Flutter.
- (Flutter) Implementation of the library camera.
- (ML Kit) Implementation of the library ML Kit.
Let's start 💪!
Rive — Design and implementation
If you don't know Rive yet, please consider visiting https://rive.app/ 😉
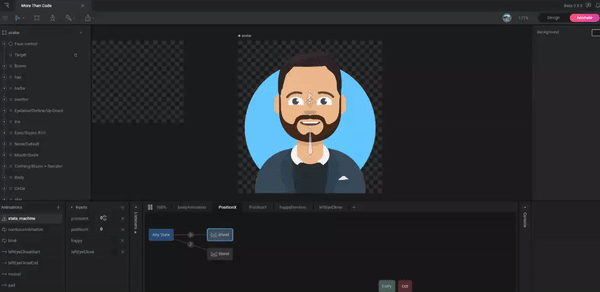
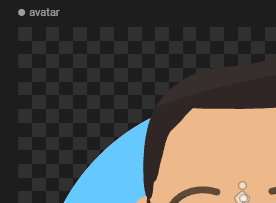
As you can see in the image on top, the idea was to create an avatar with the capability to follow my face with his eyes.
It should be noted that I am not a great designer or animator, but it was enough for the test 😅.
That's how it occurred to me to use Rive to create an animation that follows a fixed point in space.

This point, subsequently, is going to be modified by 2 input variables, positionX, and positionY, both accessible from Flutter.
For this, Rive has something called State Machine, which allows the control of the animation throwing these 2 variables.
Once the variables were assigned to their respective animations, I got the following result:
Something that blow my mind was the facilities of Rive to import and use the animations, applying just a few configurations.
Once the rive package was imported on Flutter, just needed to execute the next code:

RiveAnimation has a first parameter to configure the .riv exported from Rive.
A second attribute is called artboard. This refers to the place of work in the principal project. You can find this name on the superior corner of your animation, or the left of the hierarchy tree.
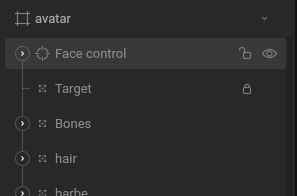
You can create a lot of artboards into the same project, and work individuality in each one of them. It's for this, that the library demands define it.
Finally, the onInit parameter is executed once RiveAnimation is initialized. In this method, I initialize the controller of the State Machine and the input variables (positionX and positionY).

Rive was ready! 🥳
Flutter — Camera implementation
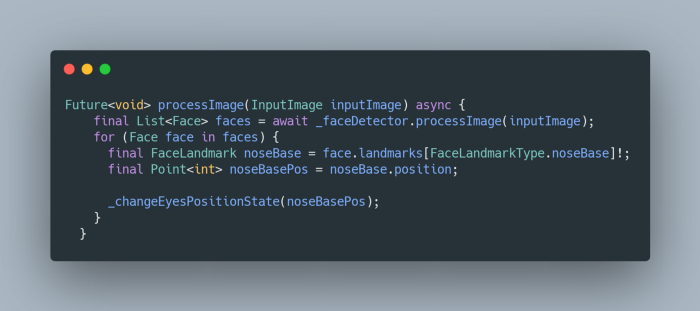
I saw the need to implement the camera package, which allowed me to access the front camera of the cell phone and analyze in real time where my face was (specifically my nose 👃).
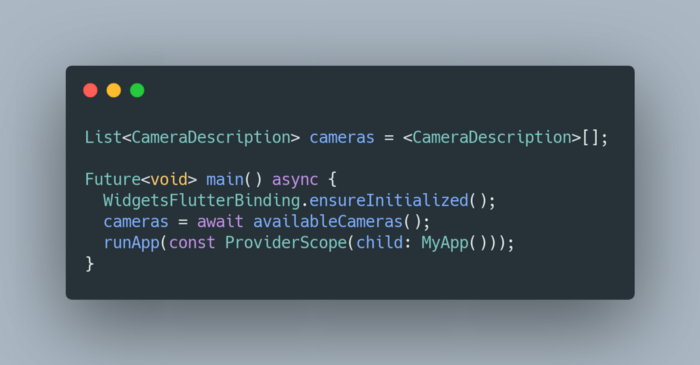
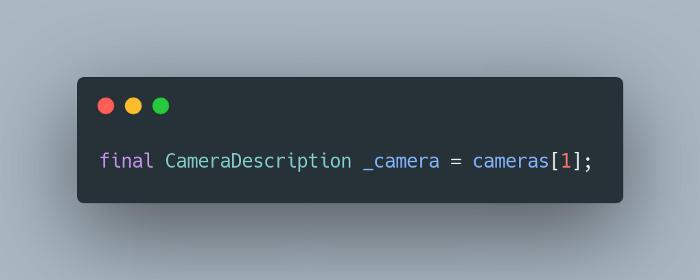
The initialization of this package begins by defining a list of CameraDescription. Through this list we can access the cell phone cameras, being cameras[1] the front camera.
The next step was to create a CameraController. This going to handle a data stream that would return an InputImage to be analyzed later by ML Kit.
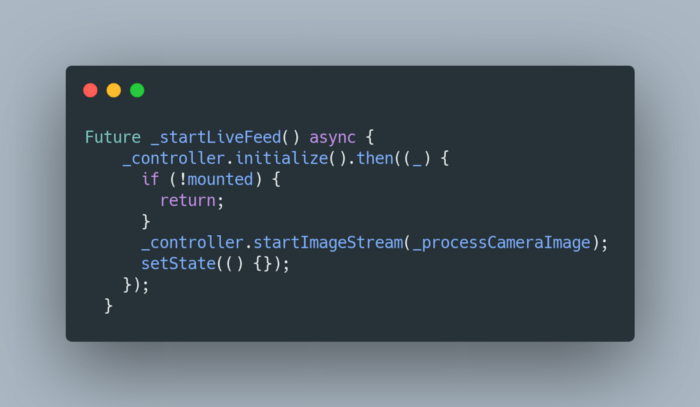
Access to the front camera! ✅
ML Kit — Nose Analyzer 😜
I could now move my animation wherever I wanted through input variables, and I could access my nose through the front camera of my cell phone. It only remained to unite both parts.
The implementation of google_mlkit_face_detection was relatively simple.
I needed to initialize our FaceDetector, and in this case, activate the Landmarks option to identify the position of my nose.
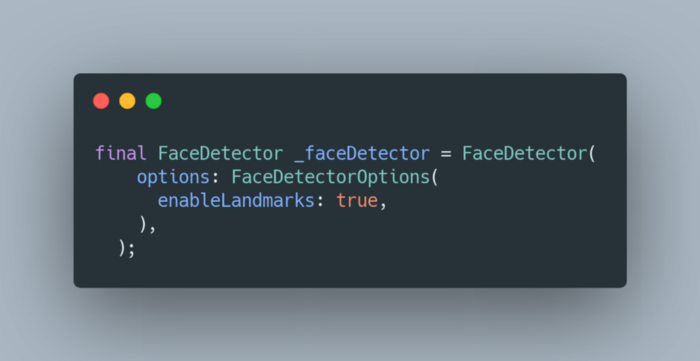
To learn a little more about the options and features of face_detection I recommend you visit https://developers.google.com/ml-kit/vision/face-detection
Through the processImage method, I got the points in X and Y, and with that, it might have been enough to animate the avatar, but it was quite expensive to constantly render the image, which led me to think of another option.
It occurred to me to "build" a kind of quadrant that will have 9 positions.
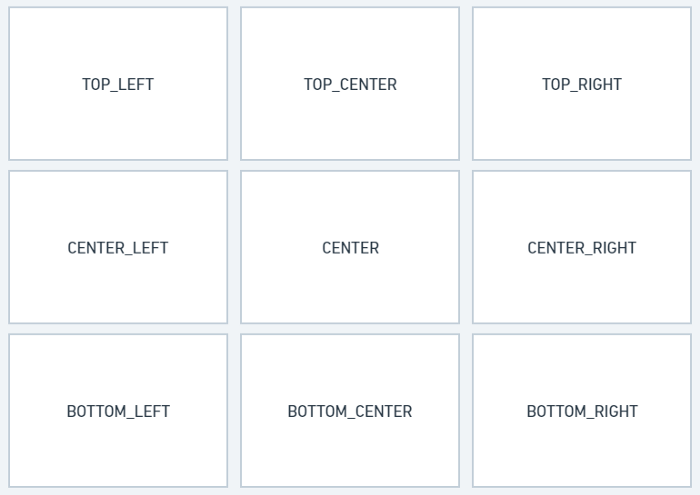
Each of these quadrants was obtained from conditions greater and lesser than X and Y, within the camera frame.
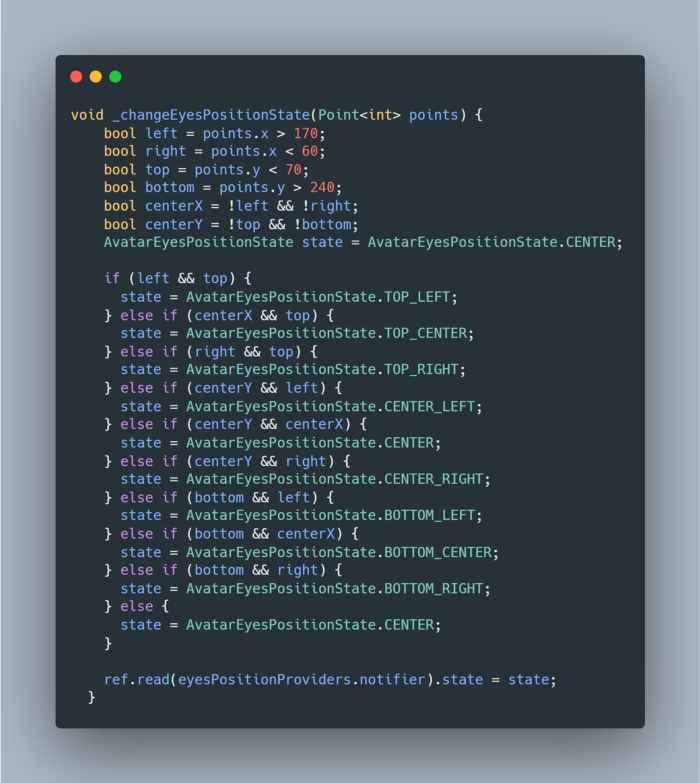
In this way, the animation would only be re-rendered in those cases where the position of the nose met any of the conditions.
At the end of the method, we can see the ref.read(eyesPositionProviders.notifier).state statement, which can be a bit confusing if you've never used flutter_riverpod before.
This was necessary to be able to communicate to the animation when it should be rendered and how to do it.
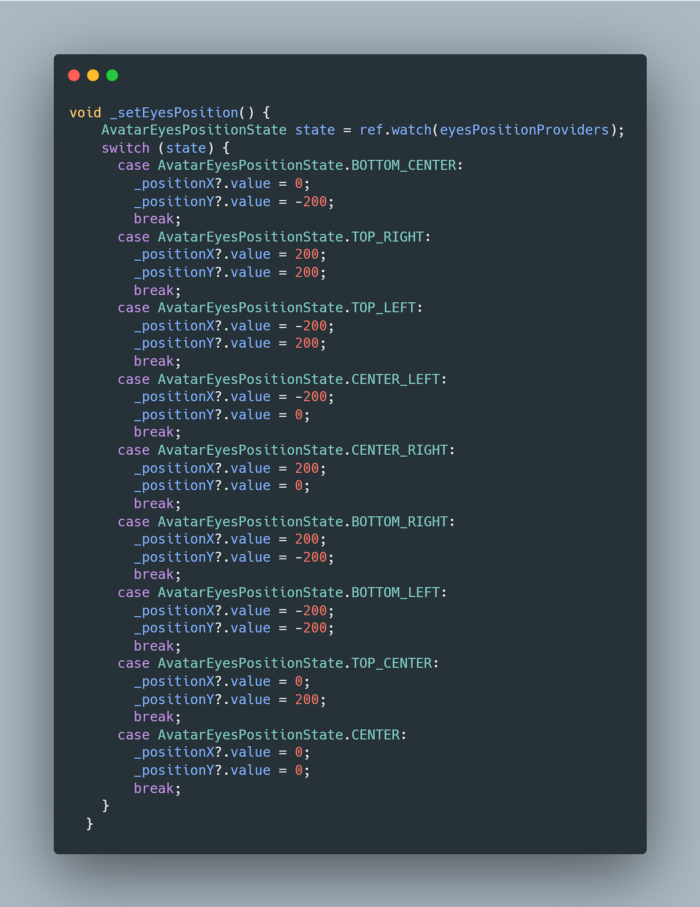
And, with this last method, I was already able to make my avatar focus on my nose. 😄
...
And that's it!
I invite you to learn a little more about the code at https://github.com/Mauro124/avatar_animation
Thank you for coming this far. 😊
See you in the next post! 👋🖖
...
MISCELLANEOUS DATA
- The avatar was generated through https://getavataaars.com/
LIBRARIES USED
- For .riv animation implementations, rive.
- For state handling with flutter_riverpod.
- For face detection, google_mlkit_face_detection.
- For the camera, the package camera.
...
Do you want to develop an app in Flutter? Learn more about us at https://mtc-flutter.com/ Follow us on Instagram @mtc.morethancode